How to Identify and Correct Seed Starting Problems
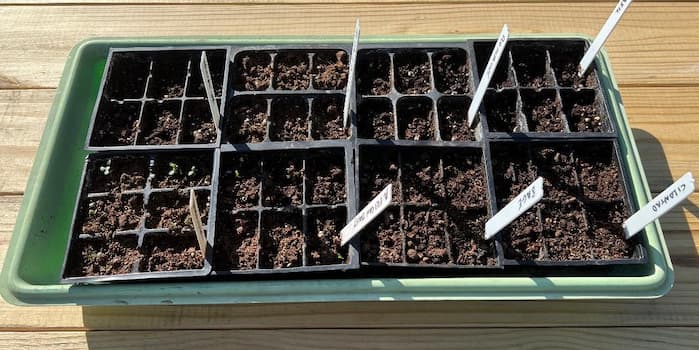
Trouble Shooting Seed Starting Problems
Whether indoors or out, when seeds do not sprout, it is a major disappointment and a setback to your garden plans. Seed starting problems occur all too frequently. Whenever it occurs, you want and need to quickly identify and correct seed starting problems, and salvage your gardening season.
If you have bought fresh, current year seed, and it is a reputable brand, it rarely is the fault of the seed. Yet most often, the gardener blames the seed. The trouble with this conclusion is that the true cause is not identified, and the problem is apt to recur. In this situation, the gardener goes out and buys a new seed (a different brand perhaps). Then, they don’t sprout again.
The task at hand is to troubleshoot the true cause of the problem. First, assume the seeds were good, and then try to identify why the seeds did not sprout. This will almost always get you to problem resolution and corrective action, resulting in successful germination on the second try.
Garden Tip: If the seeds were planted longer than the number of days to germination, do not assume they will not sprout. Growing conditions are often less than ideal, requiring additional days to germinate. Seek to improve the germination environment.
The guide below will help you troubleshoot problems and correct them.
Causes and Cures for Poor Seed Germination
Garden Tip: Sometimes more than one of the problems below are present.
Seed Planted Too Deeply
This is perhaps the #1 cause of germination problems experienced by new growers. Gardeners plant them too deep. Tiny seeds can be washed out of, or too deeply into the soil.
The seeds end up too deep, and they are unable to reach the surface.
Check the seed packet for proper seed depth. Plant at the recommended depth, or less. It’s okay to plant seeds shallower than recommended.
For tiny seeds, try placing them on top of the soil, and lightly water them.
Soil Too Wet or Too Dry
In wet soil, seeds rot before they even get the chance to sprout.
In dry soils, seeds do not sprout. They dry out or “cook”.
If the soil started out moist, then was allowed to dry out too much, the tiny seedling shrivels and dies before, or just after, emerging from the soil.
For almost all seeds, the soil should be moist, not wet all the time.
The soil should also be well-draining, to allow excess moisture to drain away.
Soil Temperature Too Hot or Too Cold
In hot soils, seeds can actually bake, killing them.
Seeds will not sprout in cold soil.
In general, seeds of cold weather plants germinate in soil temperatures of 60 to 70 degrees. Warm weather plants germinate in temperatures of about 75 to 85 degrees.
Find the ideal soil temperature for the seed(s) you are planting.
Use a soil thermometer to check the temperature of the soil at planting depth.
For indoor starts, room temperatures are often below ideal starting temperatures for warm weather seeds, like tomatoes and peppers. Use a germination mat, if necessary.
Soil Too Heavy or Too Hard
If the garden soil is heavy clay or hard, it is difficult for seedlings to work their way up through the soil. It may also be difficult for the seedling’s tiny roots to grow through the soil.
Small rocks, stones, and debris can keep seedlings from emerging.
Before planting, remove, rocks, wood, and other debris, that can impede a seedling from emerging.
Work plenty of compost, and peat moss into the soil to loosen it up.
Garden Tip for heavy soils: When planting seeds, don’t cover them in heavy garden soil. Use seed starter soil to cover them.
Pests or Insects Eating Seeds
Seeds are part of the diet of squirrels, chipmunks, mice, many birds, and some insects.
If your seeds didn’t sprout, dig a small area up, to see if the seeds are there.
Check the seed packet for the number of days to germination. If you saved seeds and do not have the information, check our site for information on the plant(s) you are growing.
Germination times assume optimum sprouting conditions. The actual number of days will be equal to, or greater than, the days to germination.
Under less than ideal conditions, seeds will take longer to sprout.
Seed Old, Not Properly Stored
Using fresh seeds is always recommended.
Many people save seeds from prior years. If properly stored, some prior year’s seeds may remain viable for years.
Unfortunately, saved seeds are often stored in less than ideal conditions.
If an old seed does not sprout, it is definitely time to buy fresh seeds.
Seed not Viable
The only way to assure that seeds are viable is to do a seed germination test.
Seed companies are constantly performing this test, to assure product quality. As a result, store-bought, current-year seeds are almost always viable.
You can perform a seed germination test of your own. It is best to do so weeks before you plant them.
If you didn’t use all the seeds during planting, do a germination test.
Obviously, when old seeds fail to sprout, it’s time to buy fresh seeds.
Sometimes, with indoor plant starts, the plant wilts and dies shortly after sprouting. This Is NOT due to the quality of the seed. But, it certainly is a major problem.
Once the seedling has sprouted, bad seeds are no longer an issue.
Rather, this is a sign of Damping Off Disease. It is deadly to young seedlings. But, it is easily avoided.