You grew them, more than you can possibly eat fresh. As a home gardener, you want to use and preserve everything that comes out of your garden. Millions of people practice home canning of fruits, vegetables, and even meats. It is a great way to save money. Home canning extends your enjoyment of the fruits of your garden well into the winter. After all, there is no better taste, than that of a fruit or vegetable that you grew.
Certainly, canning is a bittersweet love affair. Hours and hours of canning are mixed blessings. The more you can, the more successful your garden is. But I do not know of anyone who loves to spend hours in a hot kitchen, while the waning days of summer go by. Even so, once you start this annual event, you find few people give it up. The result is just too delicious.
Read and learn how to do it safely before you begin. Safe canning techniques are vital, to enjoying the fruits of your labor. To make canning safe, follow proper sanitary and cooking processes. It produces delicious food, that you will enjoy all year round in your favorite recipes.
Your first and most important step is to learn and follow safe and sanitary canning methods. Importantly, improper canning may result in spoiled food and worse yet, the very real possibility of food poisoning.
The first step to home canning is knowing how much produce you need, and how many canning jars it will fill. See Home Canning Measurements.
Home Canning Safety
How to can foods safely, begins with these important steps:
Clean and sterilize tools and equipment. All tools should be thoroughly washed. Sterilize canning jars and bands in boiling water. This eliminates harmful germs and bacteria.
Keep jars warm (180-190 degrees), until ready to use.
Proper cleaning and preparation of food. Select fresh and healthy fruits and vegetables at peak ripeness. Wash and prepare according to directions for canning.
Precooking food is recommended over raw packing.
Process high acid foods in a boiling water bath. Use a Pressure Canner for low acid foods.
Make sure acidity is sufficient. The absence of high acidity in the food can promote harmful bacteria. Make sure you know the acid levels of the food you are canning. Add acid as needed. A common way to increase acidity is to add a teaspoon of lemon or lime juice to each quart jar.
Remove air bubbles by pushing food down firmly into the jar. Take a knife around the inside edge of the jar to help air bubbles to escape.
Leave 1/4 to 1/2 inches of headroom for most fruits and vegetables.
Wipe the top of the jars clean. To assure a good seal, the jars must have no food or residue on them.
Put lids and bands on the jars, fingertip tight.
Just before placing the jars in the canner, fill the sink with hot water. Set the jars in it for a moment. This raises the temperature of the glass and minimizes breakage.
Process properly. Once the food is prepared, packed, and sealed into sterilized jars, it is processed in a boiling water bath. Immerse the jars in boiling water for the time required in the particular recipe. You can process it longer but do not cut short the process.
Canning Tip
When putting food into jars, cold food can break a hot jar. Hot foods can break a cold jar. Warm or cool jars a little to reduce the likelihood of breakage. If a jar breaks with food in it, throw it out. Slivers of glass are likely in the food.
Did You Know?
The USDA no longer recommends an open kettle boiling water bath. They recommend only using pressure canning. Despite this recommendation, a large number of home canners still use a boiling water bath.
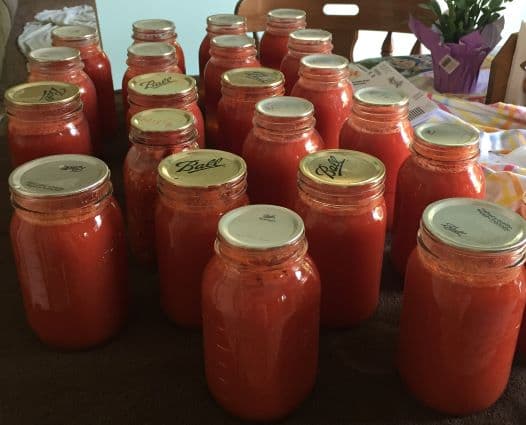
What is the most popular vegetable to can? There’s no trick question here. Canning tomatoes is by far, the most popular.
Home Canning Storage
After the jars have been processed, allow them to cool slowly.
Remove the bands carefully, making sure not to disturb the lid. Some people store their cans with the bands on.
Test the seal. Tap on the lid lightly. A sealed jar will have a sharp sound. An unsealed jar will have a duller thud.
After the canning jars are cool, wipe them with a damp sponge or cloth to remove any residue.
Label and date the contents with the fruit or vegetable inside.
Store them in a cool, dry, dark place like a basement. They must be out of sunlight and heat.
Jars can be stored for six to twelve months. They can be stored longer, but it is not recommended.
Note: Immediately after canning, if you find a lid is not sealed, immediately refrigerate it. Or, you can reprocess it with a new lid and cap.
Tips for Safe Use of Home Canned Foods
To assure safe use of your canned foods, follow these safety guidelines:
Discard the contents if:
If the seal of a stored jar is broken or the lid is bulging, discard the contents.
If the contents are discolored.
The smell is not normal in any way.
When opening the jar listen for the familiar sound of air as you pry open the lid. The air is entering the jar.